The compare mode can be started in 2 ways:
-
Starting a viewer session using the quick compare feature in the Assets module. See the article Quick Compare.
-
From within a viewer session, starting compare mode.
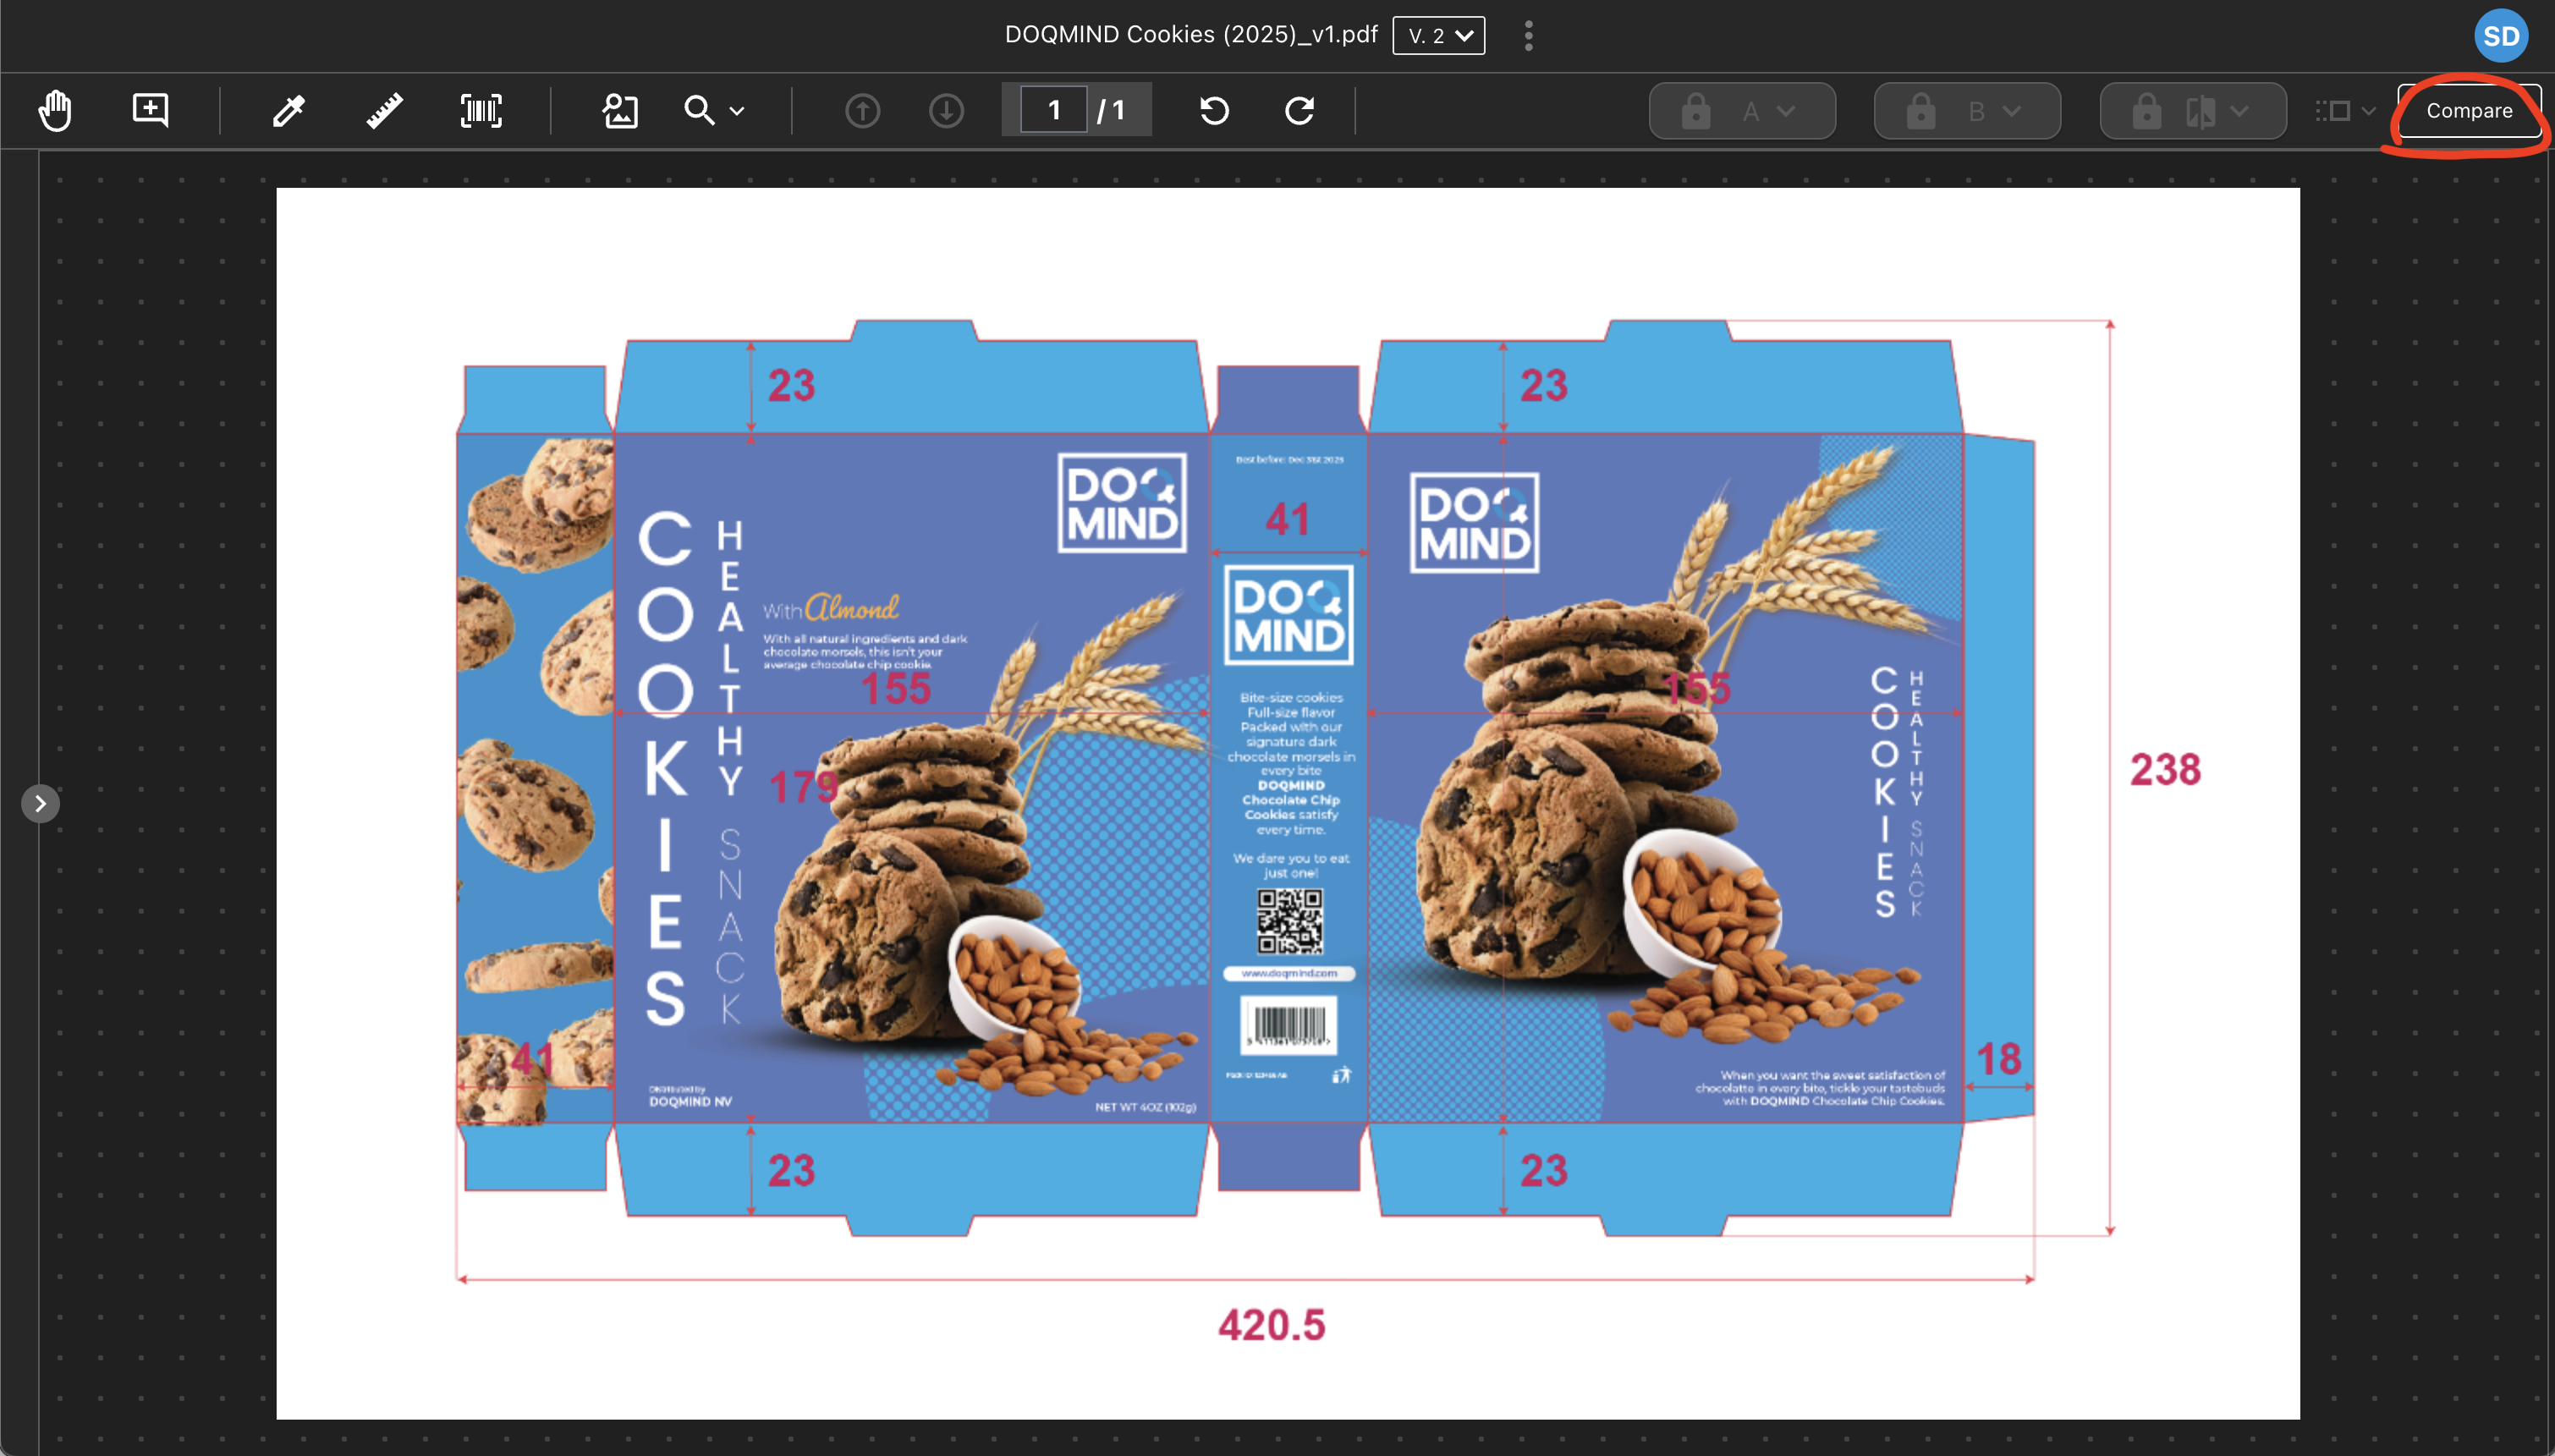
Starting Compare Mode
By clicking the button "Compare", a panel opens from the right of the screen. Here, two versions of the current asset can be selected to be compared to each other.
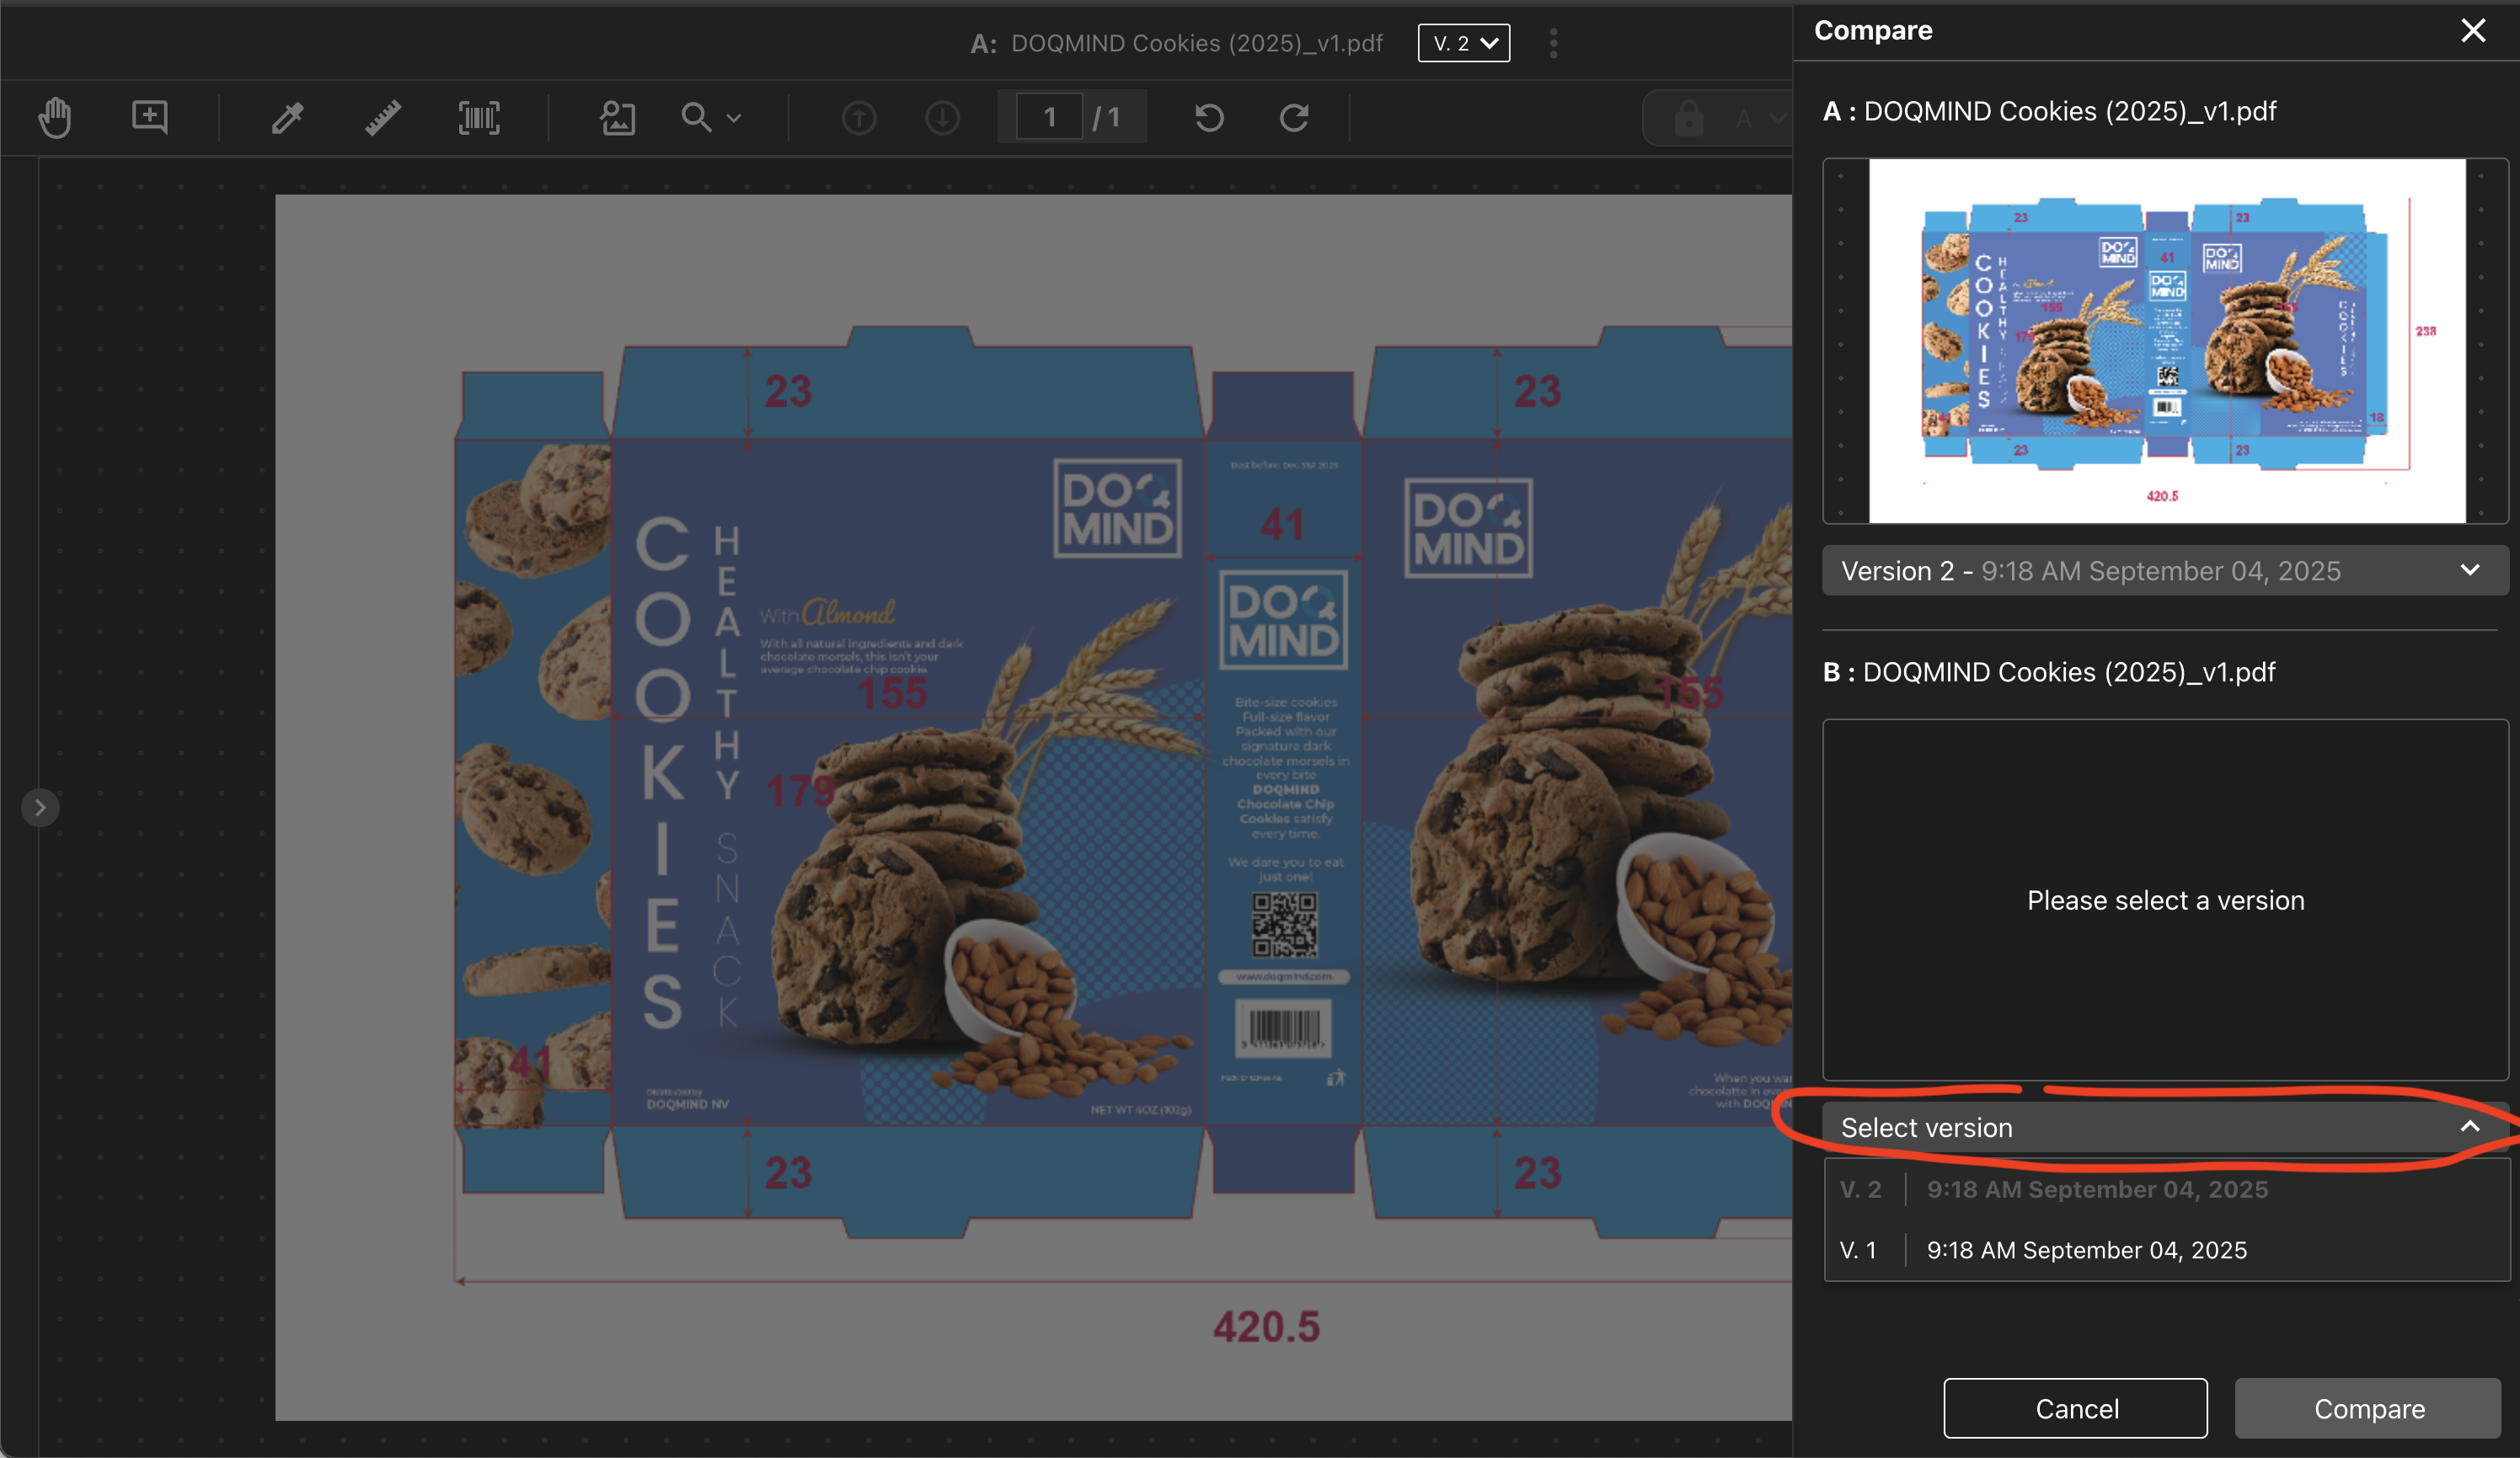
selecting a different version to compare to
Once the selected version is loaded, compare can be clicked. The viewer will now be in compare mode.
Changing the compared file
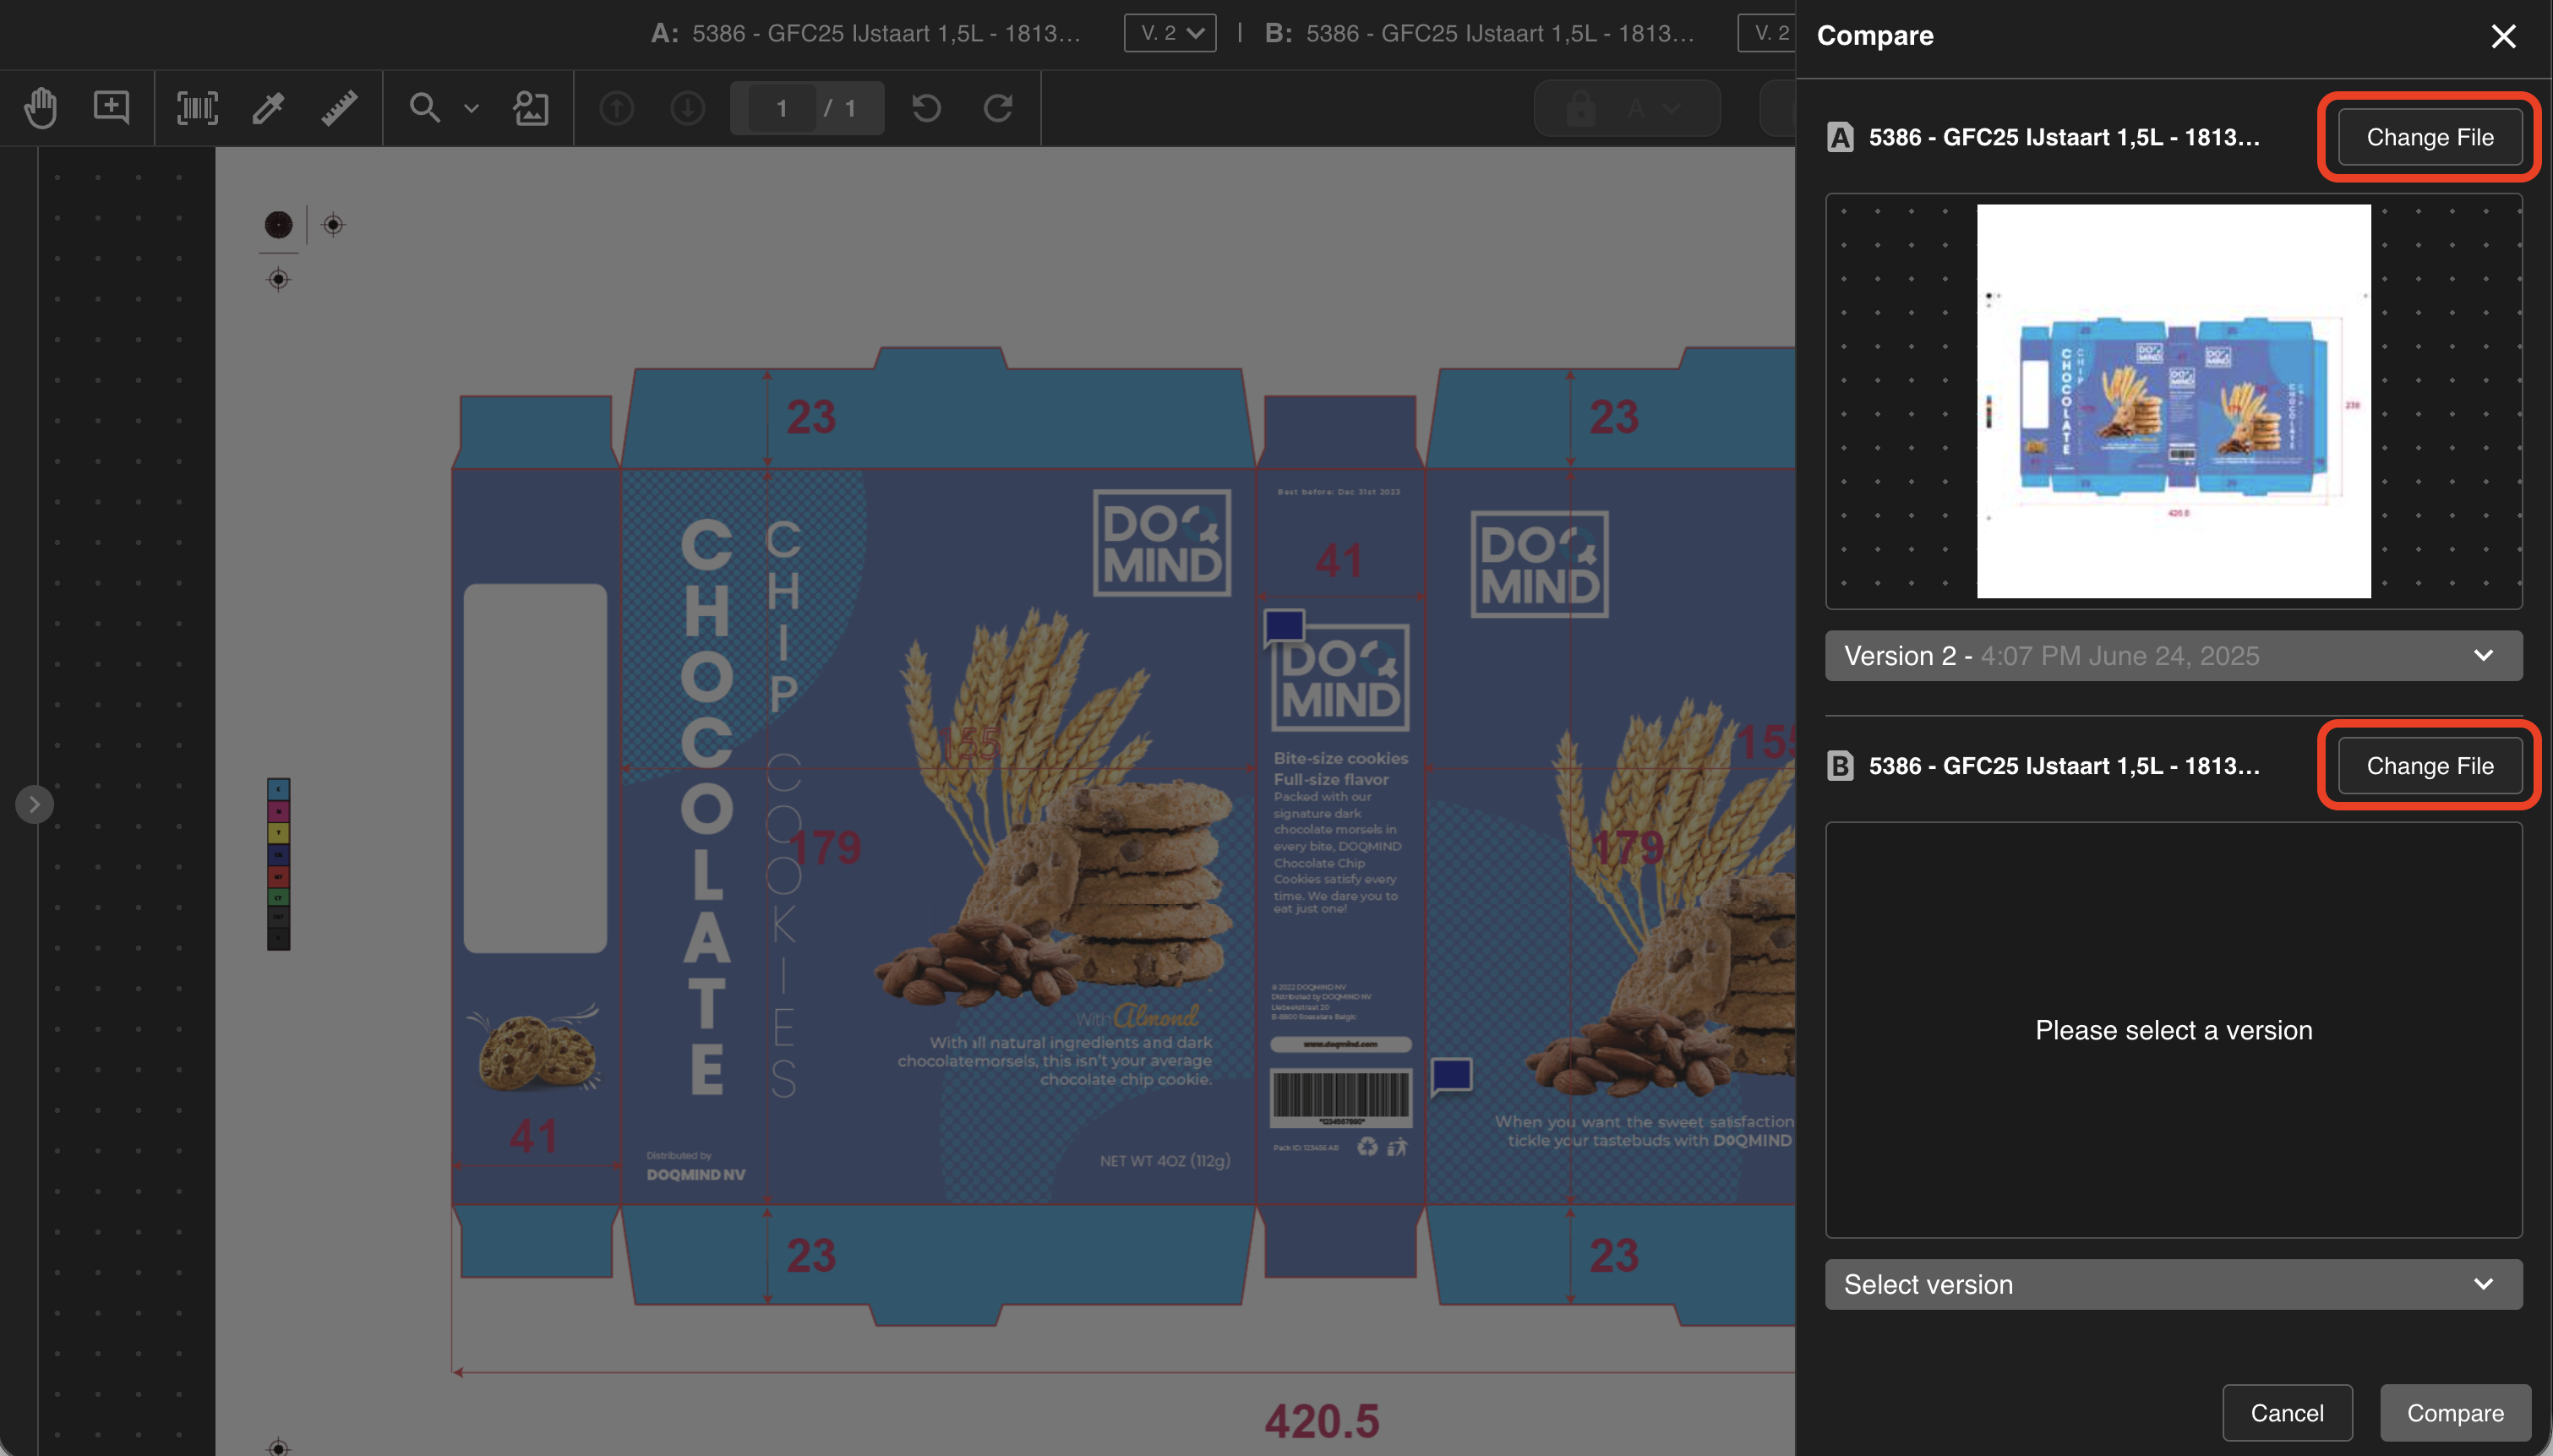
While you are in a compare session, you can swap either side of the comparison for a different asset — without leaving the viewer. This lets you compare the asset you are reviewing against a reference file, or against any asset in the library.
Opening the change file modal
In the compare drawer, each slot (A and B) has a Change file button. The button is always available, regardless of what is currently loaded.
Click Change file on the slot you want to replace. A modal opens with the header "Select file A" or "Select file B", depending on which slot you clicked.
Choosing a replacement
The modal has two tabs: Reference files and Asset Library.
-
If the current session has reference files configured, the Reference files tab is active by default.
-
If the session has no reference files, the Asset Library tab is active by default.
Reference files tab
Shows every reference file configured for the current task. You can switch between list and grid view.
Asset Library tab
Shows the full asset library. You can browse folders the same way you do in the Assets module.
Selecting the asset
In either tab, you can select a single asset. Once you select one, the Select button becomes active.
Click Select to load the latest version of that asset into the slot. From there, you can pick a different version if needed, and then restart the compare session.