Upload/Download asset
Objective
In the context of digital content management, uploading and downloading assets refers to transferring files or data between a local device and an online platform or server.
Uploading an asset means to send a file or data from your local device or computer to an online platform or server. For example, you might upload an artwork from your local filesystem to the DOQMIND Assets module.
Downloading an asset, on the other hand, means to retrieve a file or data from the DOQMIND Assets module and save it to your local device or computer. For example, you might download a project brief form to your local filesystem.
The process of uploading or downloading an asset to or from DOQMIND can be accomplished through the assets module, or through the "Upload/Download asset" task described here.
Task
The modal presented to the actor can have both a download and an upload tab.
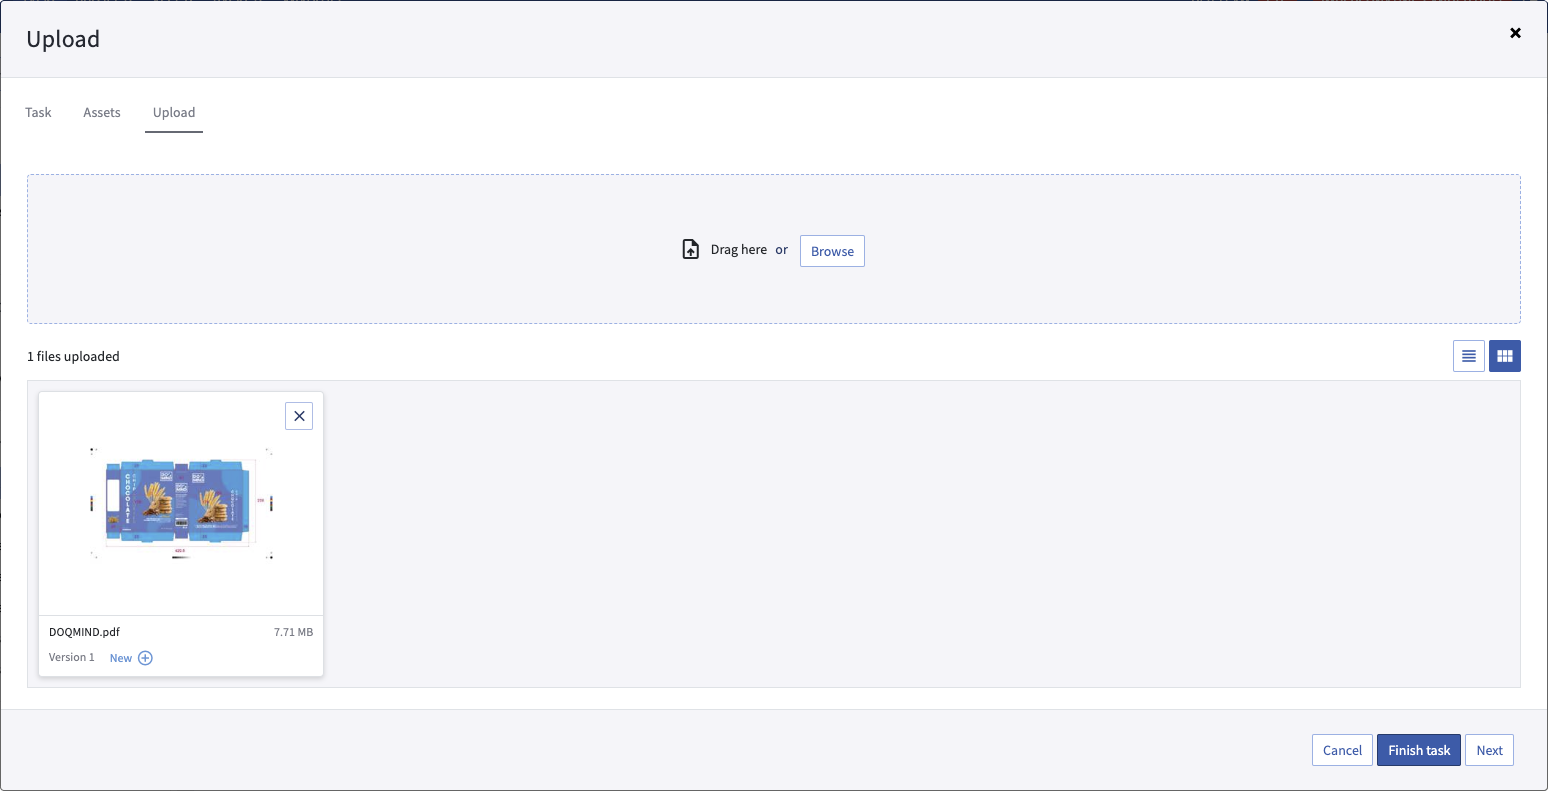
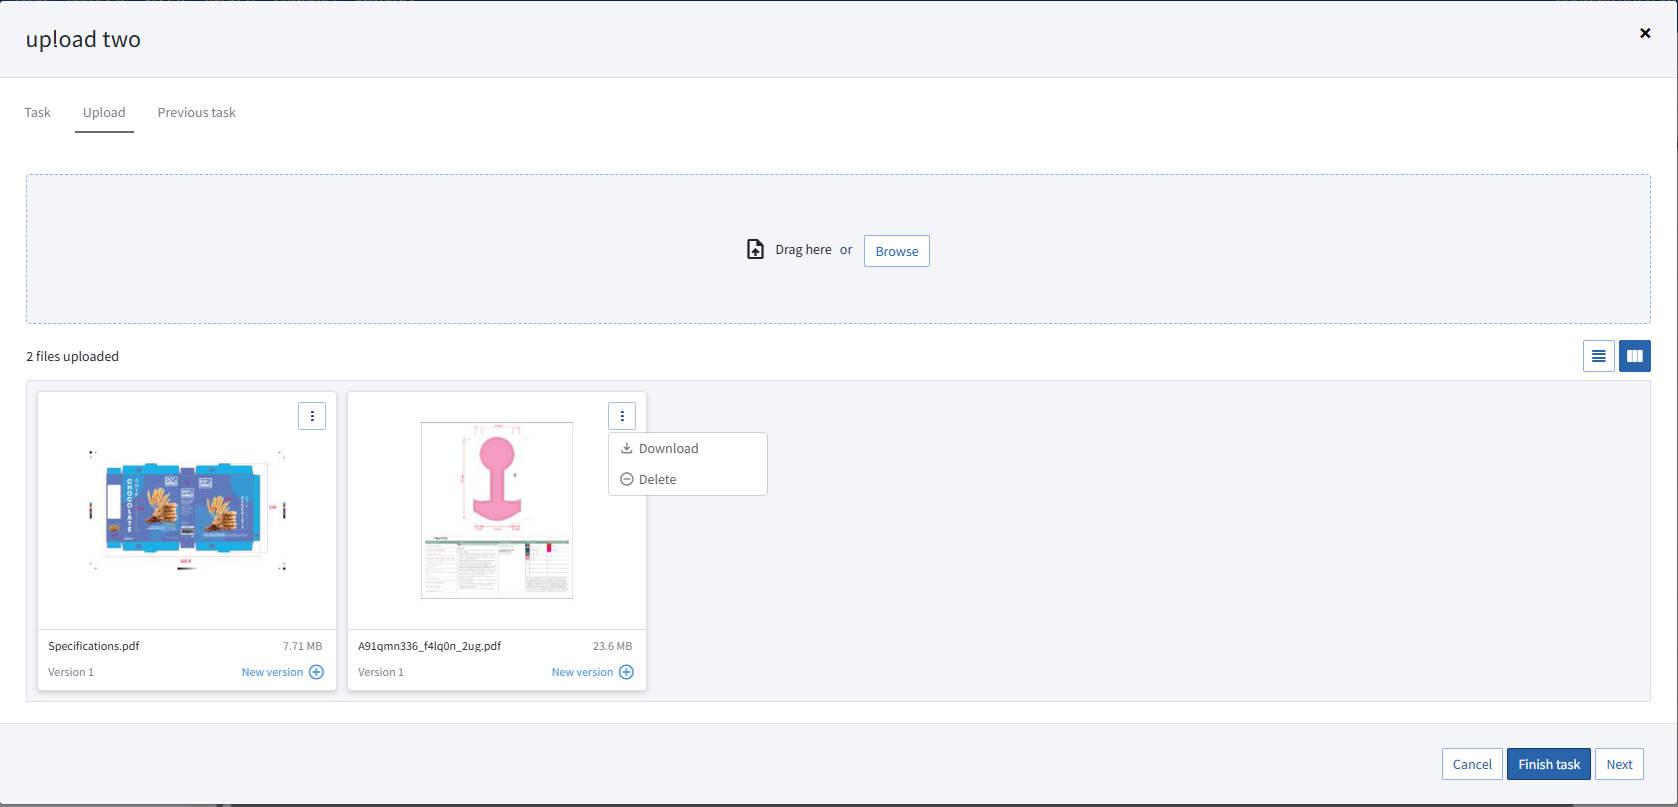
The upload tab shown to the actor when executing the task
In the upload tab, two main actions can be taken: Adding a new file, or versioning an existing file.
Versioning is possible by dragging a file with the same extension over another artwork already present in the upload window. Alternatively, "New ( + )" can be clicked on the card of an asset already present to browse for a new file to add as new version.
Adding a new file can be done by dragging a file to the top section of the window. This top section can also be clicked to browse for a new file.

dragging and dropping a file as a new version
Assets which are part of the upload reloop cycle can be removed with the 'remove from task' action.

The assets will no longer be used in the project tasks, but it will remain on the system for audit purposes.
Uploading with placeholders
When the template builder has configured placeholders for the upload task, the upload experience is structured rather than free-form. Instead of a general drop zone, you see a set of named slots — one for each placeholder defined in the task configuration.
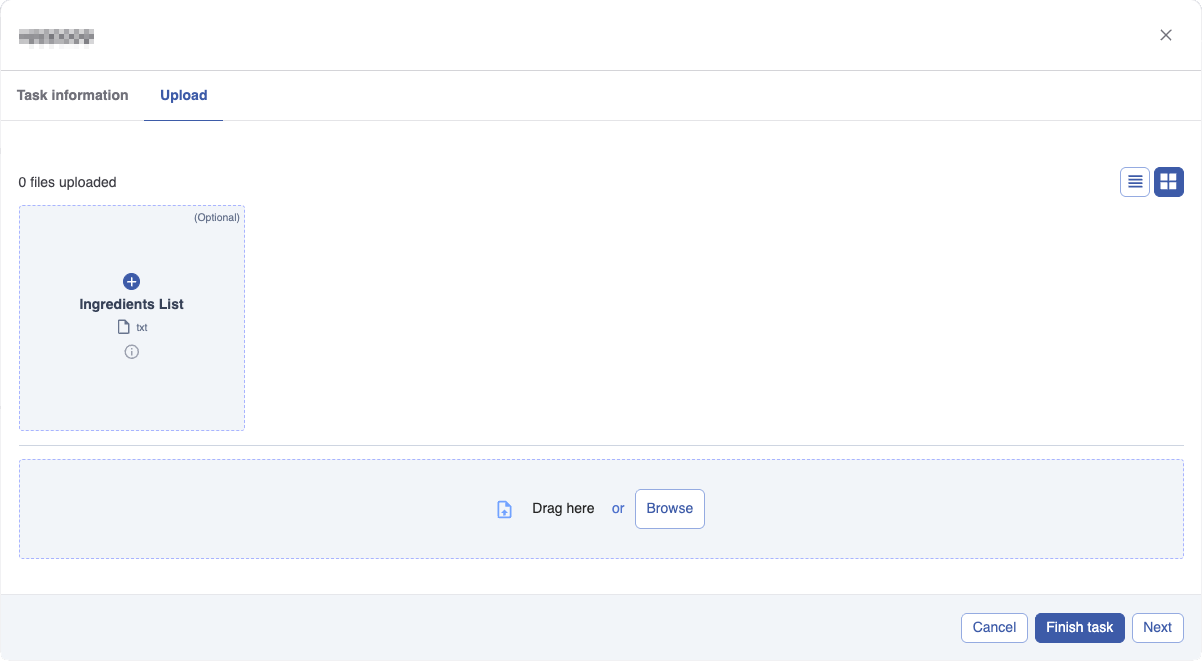
the upload tab showing a placeholder slot
Each slot shows the placeholder name and, where provided, a description explaining what should be uploaded to that position.
To upload a file to a placeholder, drag a file onto the slot or click the slot to browse for a file. Each placeholder accepts a single file. If the template builder has restricted the allowed file types for a placeholder, only files with matching extensions can be uploaded to that slot.
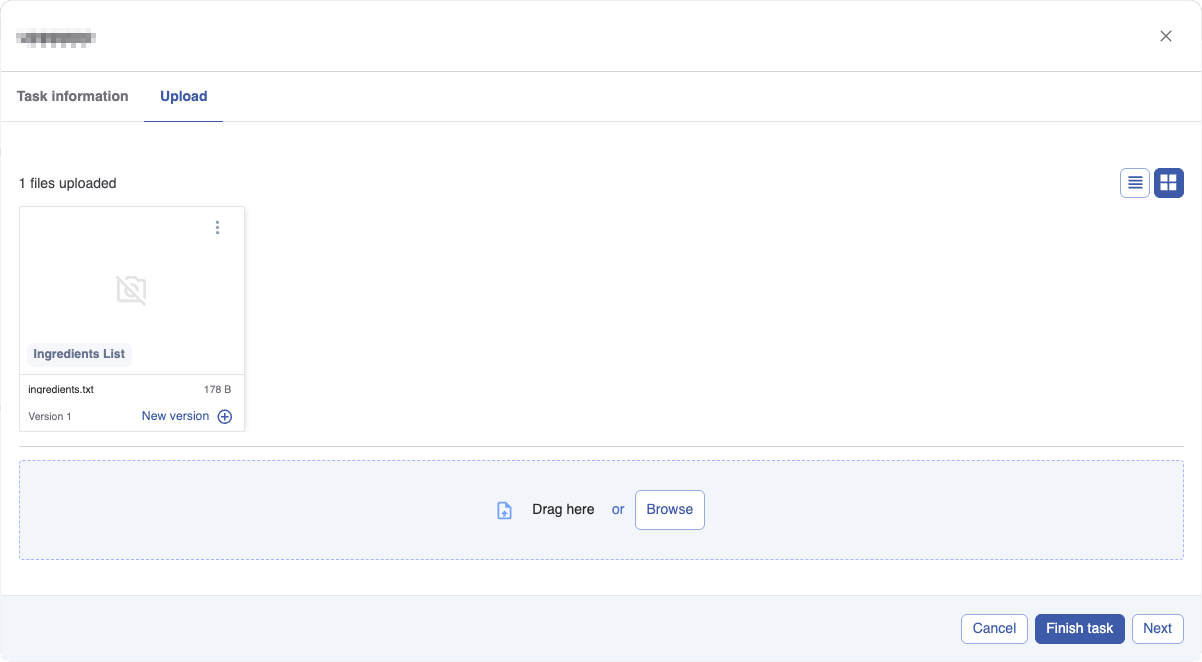
a placeholder slot after a file has been uploaded to it
Placeholders marked as mandatory must have a file uploaded before you can complete the task. Placeholders marked as optional can be left empty. If the task also allows free uploads, a separate drop zone is available below the placeholder slots where you can upload additional files without a designated slot.
You can only complete the task when all mandatory placeholders have a file assigned. If any mandatory placeholder is still empty, the complete button remains unavailable.
Parameters
Download
Source
Task
Every task that is connected and upstream to the current task is eligible.
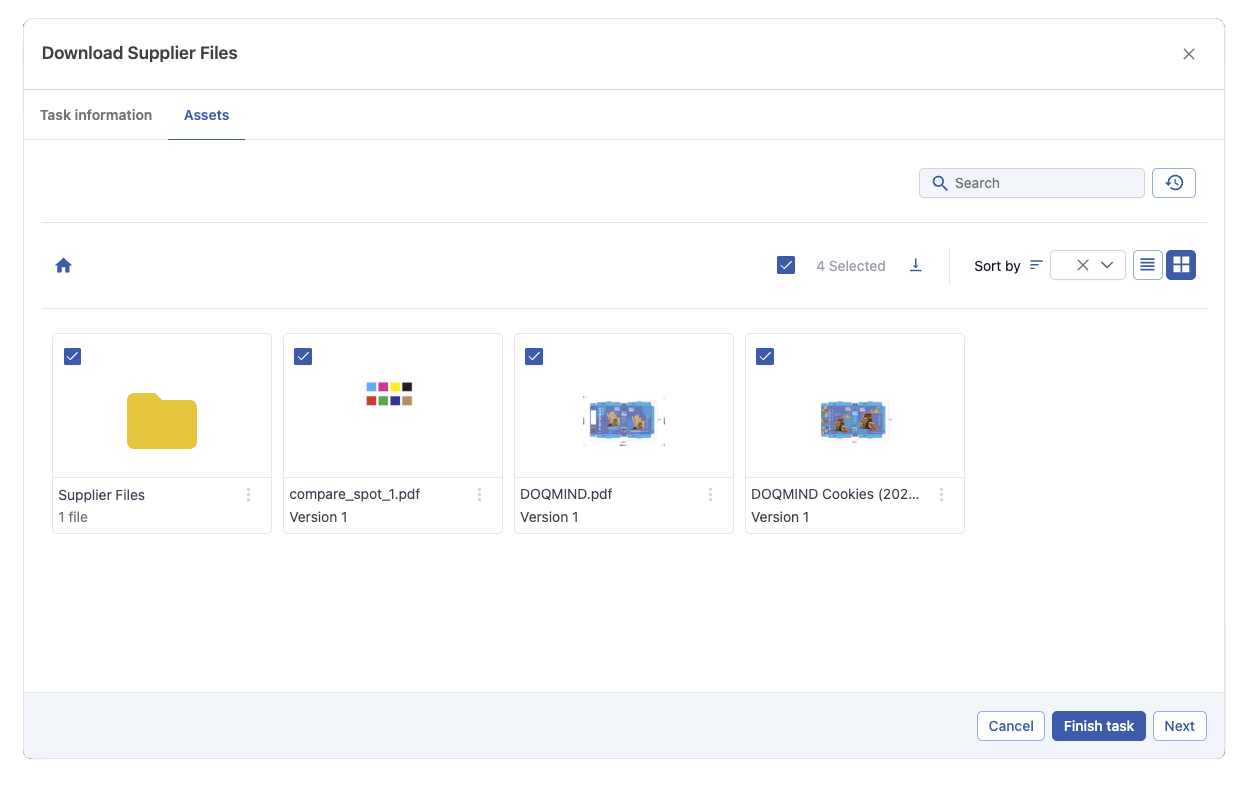
If the chosen upstream task produces an assets, it will be presented to the actor.File
Select one or more files from the assets folder structure that can be downloaded.Folder name
Select a folder, from the assets module. The contents of that folder will be made available for download by the actor.Project folder
Variable indicating the project folder with its pre-made folder structure.

A new dropdown (predefined folder) will allow you to select the sourcefolder within the project folder structure.
The 'Determine the subfolder(s)' text field allows you type in a folder structure. This folder should be created up-stream by an upload task or a fill from task with upload active.
Upload
The Upload section has two subsections that can be enabled independently: Free upload and Upload using placeholders. Both can be active at the same time.
Free upload
When enabled, actors can upload files freely without any predefined slots.
Source — Where uploaded files will be stored. Options are: Task, File, Folder name, and Project folder.
Predefined folder — When Source is set to Project folder, select a specific subfolder within the project folder structure.
Determine the subfolder(s) — Optionally type in a subfolder path within the selected source. This folder should be created upstream by an upload task or a fill-from task with upload active.
Which file types are allowed? — Optionally restrict which file extensions actors can upload. If left empty, all file types are accepted.
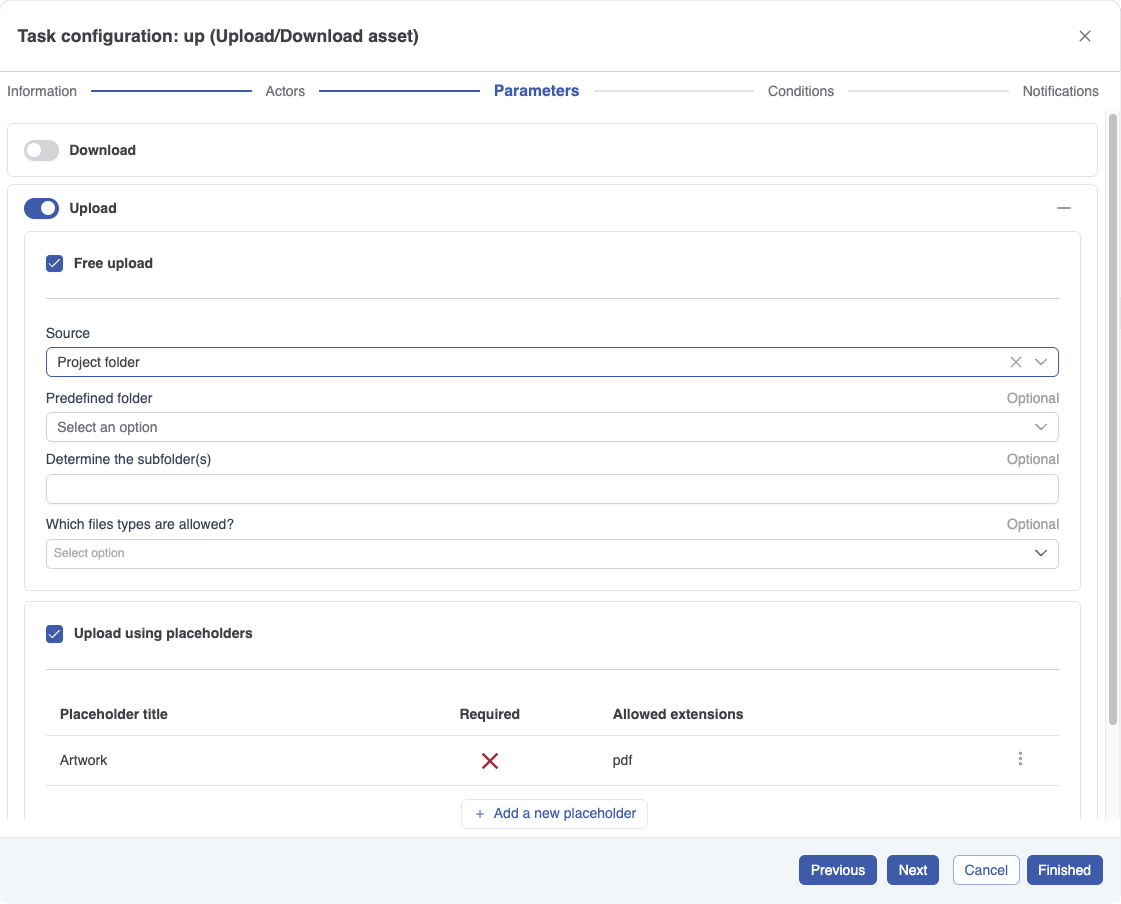
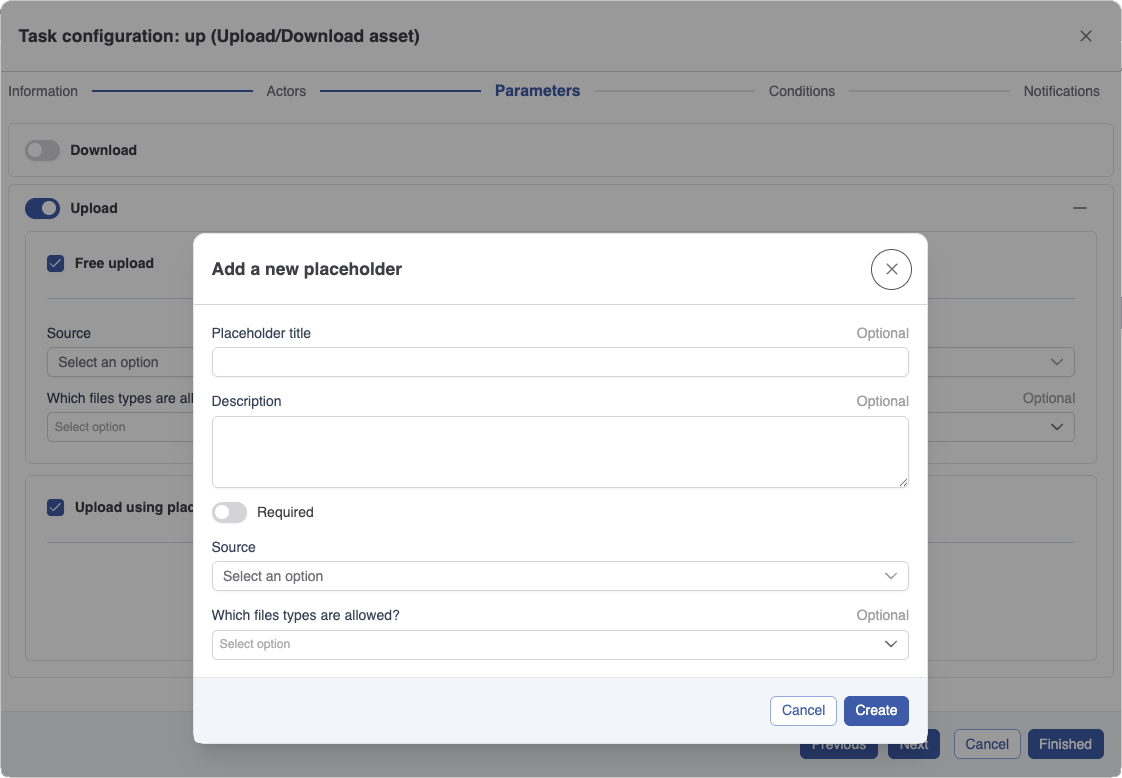
Upload using placeholders
When enabled, the upload tab shows a set of named slots instead of or alongside the free upload zone. Each slot defines what file is expected and where it will be stored.
Click + Add a new placeholder to create a slot. Each placeholder has the following fields:
Placeholder title — The label shown to the actor on the slot.
Description — An optional explanation of what should be uploaded to this slot.
Required — When enabled, the actor must upload a file to this slot before they can complete the task.
Source — Where the uploaded file will be stored, using the same options as free upload.
Which file types are allowed? — Optionally restrict which extensions can be uploaded to this slot.
Existing placeholders are listed in a table showing their title, whether they are required, and their allowed extensions. You can add as many placeholders as needed.